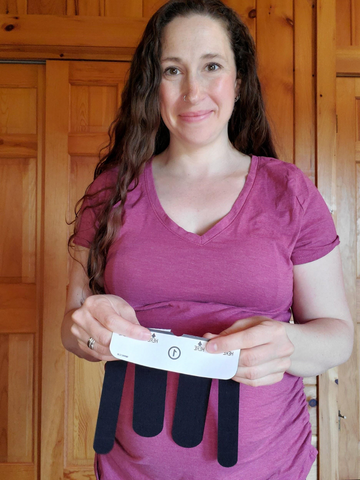
I am loving my tummytape to wear for running, and I want to show you how I apply it before I lace up my running shoes and head out the door.
At 32 weeks pregnant at the time of this writing, having belly support is integral for me to unweight my belly, take pressure off my back and my pelvic floor, enhance my posture and running form and to just increase my overall comfort.
tummytape is great to start wearing as soon as you feel you need extra support. For some moms, that's in the second trimester, and for some, it's not until the 3rd.
This is my third of 4 pregnancies that I am running through, and tummytape has been a quick, easy and lightweight alternative to the belly bands and belts that I have tried and used in the past.
YES, I am still running! Sometimes solo, sometimes pushing the double jogging stroller and very rarely pushing the single. My kids love running with me as much as I love running with them!
Here’s how I apply it to get the most benefit out of it for my runs:
Step 1: Start with clean skin and no lotion!
This is really important to make sure that the tape adheres well to the skin and stays put for more than a single run or a single day!
I typically shower and put lotion on at night before bed, so when I’m applying a fresh piece of tummytape before my morning run, I have no issues with it sticking well.
Lotion becomes an issue if you’re putting it on within a few hours of applying the tummytape.
Believe me, you don’t want it to start coming off mid-run or shortly thereafter.
Maximize the effectiveness and the wear time by following this important step!
Step 2: Prepare section #1 of the tummytape pre-cut
Fold along the bottom perforated line and then tear the tape.

Next, peel the paper backing off of the tape.

Try not to touch the sticky side of the tape as best you can, as you want it to stick well on your belly–and not on your fingers!!
Touching the tape too much before applying it to your skin can decrease the wear time of the tape as well as its overall adherence.
Step 3: Apply section #1 under the belly
I like to apply the first section of tummytape as low as possible under my belly. I find that this gives me the best lift and support of the heaviness of my growing baby.

I also have some pubic symphysis issues (discomfort at the pubic bone which forms the front of the pelvis) so getting the tape close to this joint seems to help me the most.
tummytape does not require any stretch to the tape, so make sure you’re just placing it on the skin and not stretching it at all.
Section 1 is the base from which the “fingers” of sections 2 and 3 will be providing support, so I like to rub over the tape a bit to make sure that it’s adhered really well before moving on to the next step.
Step 4: Apply the #2 sections
Next, I apply the two #2 sections along either side of my belly button.
Before I do this, I like to make sure that I’m standing with really good posture. Using a mirror is helpful for this step, so that I’m not looking down at my belly and slouching.
Standing up tall with a slight contraction of my belly muscles (activate your transverse abdominus by hugging your baby into you, up and in toward your heart) allows me to tape in optimal positioning for proper running form, which is SO important for injury and pain prevention and management as pregnancy progresses.
Taping in this way also helps me to maintain good walking form and posture throughout the rest of my day afterwards!
Again, for this step, the tape should not be stretched.
Start peeling the paper off from the base of this section, and using your finger(s) of one hand, guide the tape upwards on your belly as you slowly peel the paper off with the other hand.
Repeat with the other side.

And sidenote, it’s OK if the tape isn’t placed exactly the same distance on either side of your belly button, or if one piece has a little wiggle to it (i.e. it’s not perfectly straight).
It’s best to leave it on once placed because if you peel it off to start again, the stickiness factor will be decreased. Meaning, it won’t stick as well the second time around, or may not stick at all.
And you don’t want to waste your tape, or get a short wear time out of it!
Place it down and just go with it! You’ll get better at it the more times you do it. So don’t worry if it’s not perfect this time!

Step 5: Apply the #3 sections
Apply the #3 sections just as you did the #2 sections, without stretch and to either side of the #2 sections.
These ones tend to pull up a little higher than the #2 sections on me. It’s ok if yours do too.

Step 6: Rub to adhere your tummytape
Because tummytape is kinesiology tape, it is body heat activated.
I like to go over each section that I just applied and rub it with my fingers to really make sure that the glue activates and sticks well to my skin.
The last thing I want is for the ends to start peeling off within a short time of application.
I want the most support and the most wear time possible out of my tummytape, so rubbing to heat activate will ensure this.

Step 7: Run!
And that’s it! Once each section of the tummytape is on, I’m ready to lace up my running shoes and head out the door.
I have found that I can just tape and go. I don’t need to wait any length of time before running after I apply my tummytape.

It stays put through sweating, my shower afterwards and the rest of the day. Several days, in fact!
That’s one of the great things about it–I only have to apply my tummytape once to get several days of constant support!
tummytape and go run!
It’s so fast and easy to apply, way quicker than other taping methods I’ve used in the past. The first one or two times might take you a little longer, but after that, you’ll be a pro at putting it on. It literally takes about 30 seconds and I’m good to go. Choosing the color you want to wear might actually take longer than putting it on! Check out our full collection now.

So, tummytape and go run! Let us know what you think!!
This article was written by Doc Rachel.

Rachel Pope is a Doctor of Physical Therapy, Pregnancy & Postpartum Exercise Specialist and Run Coach for Moms. She's a long time runner, hiker and mom of 4. To learn more, visit www.rachelpope.co